
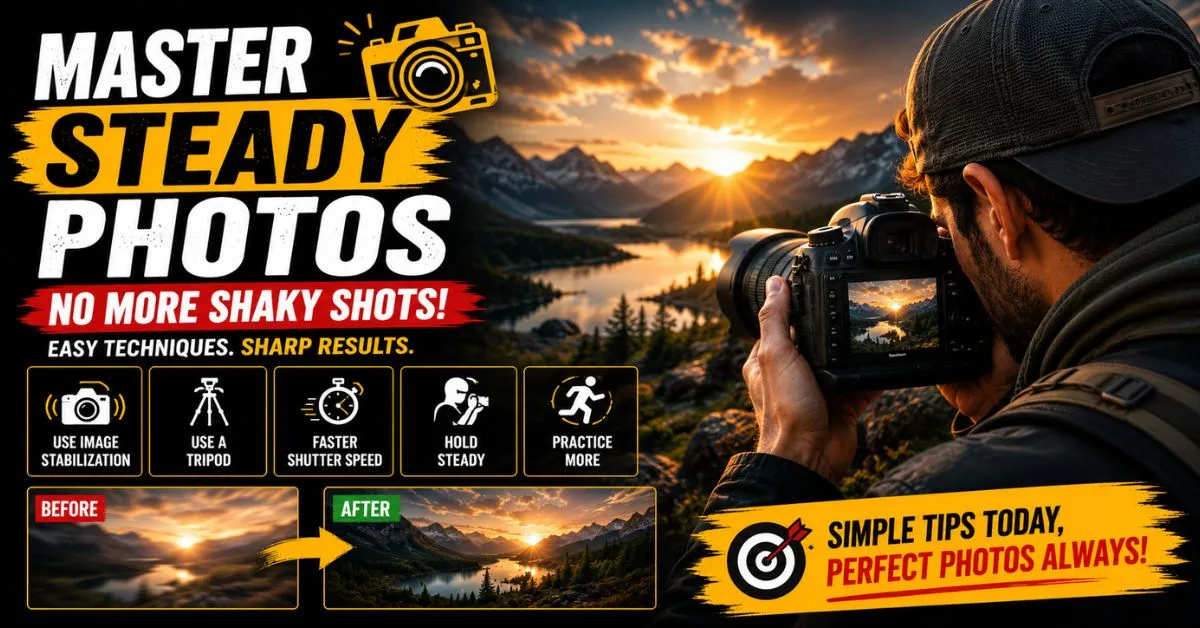
How to Fix Shaky Hands Photography: 14 Proven Techniques for Sharper Photos
Camera shake ruins more photos than bad lighting ever will. Here’s how to stop it — whether you’re shooting on a smartphone or a full-frame mirrorless.
You raise the camera, hold your breath, press the shutter — and the photo comes out blurry. Again. You zoom in and what should have been a crisp shot looks like it was taken through a fogged window.
It’s one of photography’s most universal frustrations, and the cause is almost always the same: camera shake from unsteady hands. The good news is this is almost entirely fixable. With the right combination of technique, camera settings, and a few affordable accessories, you can go from consistently blurry to consistently sharp.
This guide covers everything — the physical and psychological reasons your hands shake, the exact camera settings to use, how to hold your camera properly, the best accessories to buy, and how AI tools can save photos that have already been taken. Whether you shoot on a phone or a $3,000 mirrorless body, every technique here applies to you.
1. Why Your Hands Shake While Shooting
Before you can fix the problem, you need to understand what’s causing it. Camera shake isn’t just clumsiness — it has physical, psychological, and environmental roots that most photography guides skip entirely.
Natural physiological tremor
Every human being has a natural hand tremor. Even at rest, your hands oscillate at somewhere between 8–12 Hz — roughly 8 to 12 micro-movements per second. At normal shutter speeds and wide focal lengths, your camera can’t detect this. But zoom in or slow your shutter down, and those tiny movements translate directly into blur.
Caffeine and stimulants
Caffeine amplifies your natural tremor — sometimes dramatically. If you’ve had two or three coffees before a shoot, your hands may be shaking more than you realize. This is especially noticeable during telephoto or macro photography, where any movement is magnified.
Fatigue and muscle strain
Holding a heavy DSLR or mirrorless camera extended at arm’s length for even a few minutes causes muscle fatigue. Tired muscles shake. Many photographers don’t realize that the physical strain of holding their gear is what’s introducing blur.
Stress, adrenaline, and anticipation
Event photographers, wildlife shooters, and street photographers often experience what’s called “shutter anxiety” — a surge of adrenaline right before pressing the shutter. Adrenaline causes hands to shake. The irony is that the more you care about a shot, the more likely you are to introduce camera shake.
Low-light conditions
In dim environments, your camera automatically selects slower shutter speeds to gather more light. A slower shutter means the sensor is exposed for longer — which means more time for hand movement to register as blur. Low-light photography is where camera shake hits hardest.
Poor posture and unstable positioning
Hunching forward, locking your knees, holding your elbows out wide — all of these create an unstable shooting platform. Your body is your first line of defense against camera shake, and posture matters more than most people think.
“A slow shutter speed doesn’t cause blur — your hands do. The shutter speed just determines whether your hands have enough time to cause it.”
2. Signs Camera Shake Is Ruining Your Photos
Not all blur is the same, and misdiagnosing the cause will send you chasing the wrong solution. Here’s how to tell if camera shake specifically is your problem:
Camera shake symptoms
- Edge blur with a sharp center — the subject looks acceptable but edges smear directionally
- Uniform blur in one direction — a subtle streak, usually horizontal, across the whole frame
- Soft, hazy detail on stationary subjects — if the subject wasn’t moving but the image is soft, it’s almost always camera shake or focus error
- Worse at longer focal lengths — a 200mm lens magnifies shake 4× more than a 50mm
- Inconsistency across rapid-fire shots — some sharp, some not, with no obvious pattern
- Only affects handheld shots — your tripod shots are fine but handheld ones aren’t
Compare this to subject motion blur (moving subject, stationary camera) and focus error (wrong plane of focus). Camera shake typically produces multi-directional softness across the entire frame, while subject blur smears only the moving parts.
3. Best Camera Settings to Reduce Blur
Your camera settings are your first and most immediate defense against camera shake. Get these right before you even think about grip or accessories.
The reciprocal rule for shutter speed
The most fundamental guideline in handheld photography: your shutter speed should be at least the reciprocal of your focal length. Shooting at 50mm? Use 1/50s or faster. At 200mm? 1/200s minimum. On a crop sensor, apply a 1.5× or 1.6× crop factor — so 200mm on a crop body means 1/320s or faster.
This is a baseline, not a guarantee. If your hands are already unsteady, double or triple this value.
| Focal Length | Minimum Shutter Speed | Recommended for Shaky Hands |
|---|---|---|
| 24mm (wide) | 1/25s | 1/60s or faster |
| 50mm (standard) | 1/50s | 1/100s or faster |
| 85mm (portrait) | 1/85s | 1/160s or faster |
| 135mm | 1/135s | 1/250s or faster |
| 200mm+ | 1/200s | 1/400s or faster |
ISO and its trade-offs
Raising ISO allows faster shutter speeds in low light — which directly reduces blur from camera shake. Modern cameras handle ISO 3200 and even ISO 6400 with very acceptable noise. A slightly noisy but sharp photo is always better than a clean but blurry one. Don’t be afraid to push ISO if it means getting a usable shutter speed.
Enable image stabilization — correctly
Optical image stabilization (OIS on lenses, IBIS in camera bodies) can compensate for 3–8 stops of camera shake. But there are two important caveats:
- Turn off stabilization when shooting from a tripod — it can actually hunt and introduce blur on a stable platform
- Use the correct stabilization mode: Mode 1 for stationary subjects, Mode 2 (panning mode) when tracking moving subjects horizontally
Burst mode as a shake buffer
Shoot a burst of 5–10 frames rather than a single shot. When you press the shutter button, the first and last frames are most likely to be affected by the button press itself. The frames in the middle — when your grip has settled and you’re following through — are consistently sharper. Review them and keep the best.
Use a self-timer or remote shutter
Even the act of pressing the shutter button introduces micro-vibrations. A 2-second self-timer or a wireless remote shutter release eliminates this entirely. For still subjects, this single change can make a dramatic difference.
4. Proper Hand Positioning Techniques
Your body is a tripod. Most photographers drastically underestimate how much their shooting stance and grip affect image sharpness.
The correct two-handed grip
Right hand wraps around the grip, index finger light on the shutter. Left hand goes under the lens barrel — not to the side — creating an upward-pushing cradle. This transfers some of the camera’s weight from muscle tension to skeletal support.
Elbow and arm positioning
Keep both elbows tucked against your torso. This is the single most effective free technique for reducing camera shake. Elbows out wide means your arms are floating — elbows in means your arms are braced against your body mass, which acts as a natural dampener.
Stance and body position
Stand with feet shoulder-width apart, slightly staggered (one foot forward). Lean very slightly into the camera. If you can brace against a wall, tree, car, or any solid surface — do it. Even resting your forearms on a railing or table dramatically reduces shake.
Controlled breathing
Military and precision shooting sports teach this for good reason: fire at the natural pause between breaths. Exhale slowly, pause at the bottom of the exhale, shoot. You have roughly 2–3 seconds at that pause where respiratory motion is minimal. This is when your hands are steadiest.
5. Smartphone Photography Stability Tips
Smartphone photographers often dismiss camera shake as a “real camera” problem. But phone cameras are actually more susceptible — their small sensors require computational compensation, and most people hold their phones at awkward, unstable angles.
Two-thumb grip with palm support
Avoid holding your phone with fingertips only. Use both hands, with your palms providing a broad base of support. Tuck your elbows in. If shooting in portrait mode, try pressing the phone lightly against your nose bridge — it creates a third point of contact and reduces tilt dramatically.
Use volume buttons as a shutter release
Tapping the on-screen shutter button introduces motion. Use the physical volume button on your phone instead — it’s a stiffer press that transmits less vibration. Or better yet, use a wired earphone with an inline volume button as a remote shutter.
Use a phone’s built-in stabilization modes
Most modern smartphones have Cinematic mode (iPhone), Steady video (Samsung), or similar stabilization. For video specifically, always enable the highest stabilization mode available. For stills, the key setting is shutter speed — check if your phone’s Pro or Expert mode lets you set this manually.
Mobile accessories worth owning
A simple phone grip ring (PopSocket-style) dramatically improves one-handed stability. For more serious shooting, a phone gimbal like the DJI OM6 provides three-axis electronic stabilization. For stationary shots, a small flexible tripod (Joby GorillaPod mobile) is under $30 and highly effective.
6. DSLR and Mirrorless Stability Techniques
With heavier cameras, the techniques change slightly. Weight is both your enemy (harder to hold steady) and your ally (more mass means more inertia resistance to small vibrations).
Understanding OIS vs. IBIS
Optical Image Stabilization (OIS) is built into the lens and compensates for angular shake. In-Body Image Stabilization (IBIS) is built into the camera body and moves the sensor. Many recent mirrorless systems combine both — Sony, Nikon, Canon, and Fujifilm all offer hybrid stabilization that can achieve 7–8 stops of compensation. Understand which system your camera has and enable it properly.
Lens weight and camera balance
A heavy telephoto lens shifts the camera’s center of gravity forward. Support the lens with your left hand, not just the body. An unbalanced camera requires constant muscular correction — which introduces tremor. Some shooters use lens support plates or a monopod for lenses over 300mm.
Mirror lock-up for macro and tripod work
On DSLRs, the mirror slap at the moment of exposure creates a tiny internal vibration. For macro photography or tripod shooting at slow shutter speeds, enable Mirror Lock-Up (MLU) to fire the shutter in two stages: one press lifts the mirror, the next fires the actual exposure. Mirrorless cameras don’t have this issue by design.
Camera strap technique
Loop the neck strap around your wrist and pull the camera forward — the tension in the strap braces the camera against your hands. Some photographers use a sling strap and pull outward to create similar tension. This is a simple, free trick that measurably reduces camera shake.
7. Best Accessories for Shaky Hands
Tripod
The definitive solution. For stationary subjects or planned shots, a full tripod eliminates camera shake entirely. Carbon fiber tripods are lighter; aluminum is more affordable. Ball heads allow faster repositioning than pan-tilt heads.
Monopod
One-legged support for situations where a tripod is impractical — sports, events, wildlife. Reduces vertical shake dramatically. Combined with good technique, often good enough for 70–80% of handheld use cases.
Gimbal Stabilizer
Three-axis motorized stabilizers (DJI RS4, Zhiyun Crane) are essential for video and give exceptional smoothness for stills too. Heavier investment but genuinely transforms shaky footage into cinematic movement.
Stabilization Rig
Cage rigs with shoulder mounts, follow focus, and dual handles distribute camera weight across your body. Popular in video production. Creates a stable platform from multiple contact points with your body.
Wrist Strap
A tight wrist strap with a short tether braces the camera against the back of your hand, reducing unintentional angular movement. Inexpensive, often overlooked improvement.
Bean Bag
Underrated for wildlife and telephoto work. Place a bean bag on a car window, fence post, or rock — rest your lens on it. Provides rock-solid support for almost no cost or weight.
8. Low-Light Photography and Camera Shake
Low-light photography is where shaky hands do the most damage — and it’s the scenario most photographers face most often (indoors, golden hour, night, candle-lit restaurants). The fundamental tension is this: less light forces slower shutter speeds, and slower shutter speeds give shake more time to register.
Here’s how to navigate it:
Low-light anti-shake strategy
- Lead with ISO: Raise ISO aggressively before slowing your shutter speed. ISO 6400 with 1/250s will almost always beat ISO 800 at 1/30s when you’re handheld.
- Open your aperture: If your lens is f/2.8, shoot at f/2.8. If you have a fast prime like f/1.4, use it. A wider aperture lets in more light without touching shutter speed.
- Find support: In low light, treat every surface as a potential stabilizer — lean on a wall, rest your elbows on a table, place the camera on a ledge.
- Use Live View AF with face detection: Modern mirrorless cameras with on-sensor phase detection autofocus are faster and more accurate in low light than traditional contrast AF. Accurate focus matters — a sharp but slightly noisy shot beats a noise-free but blurry one.
- Shoot RAW: RAW files preserve more detail for post-processing sharpening and noise reduction. If camera shake does sneak in, you have more to work with.
9. Professional Photographer Techniques
Sports photographers, photojournalists, and wildlife shooters have developed body-level habits that go well beyond “keep your elbows in.” These techniques are worth learning even if you shoot casually.
The squeeze, don’t stab method
Never jab or punch the shutter button. The press should be a slow, deliberate squeeze — a gradual increase in finger pressure until the shutter fires, almost as if you’re surprised by when it fires. This is the same technique Olympic marksmen use. It prevents the involuntary jerk that accompanies a hard press.
Shooting on the downswing
For maximum stability, fire the shutter on the exhale — specifically in the half-second immediately after you stop exhaling. At that moment, your diaphragm is relaxed, your ribcage is settled, and you have the minimum amount of respiratory movement. Practiced shooters do this instinctively within a second or two of raising the camera.
Follow-through
Don’t drop the camera immediately after pressing the shutter. Hold the position for a full second. This matters especially in burst mode — releasing early means the last frames of your burst are increasingly blurry.
Know your personal “floor”
Every photographer has a minimum usable shutter speed they can reliably achieve handheld. For most people it’s around the reciprocal of their focal length; for photographers with pronounced tremors, it might be 2–3× faster. Knowing your floor helps you make smarter decisions about when to reach for support.
10. AI Tools and Software to Fix Blurry Photos
Even with perfect technique, some shots will still have camera shake. Fortunately, AI-powered software has made significant progress in recovering detail from blurry images — though no software can fully rescue a severely blurred photo.
Adobe Lightroom — Denoise + Sharpening
Lightroom’s AI-powered Denoise feature uses machine learning to eliminate noise while recovering edge detail. Combined with the Detail panel’s sharpening tools and masking slider, it can improve mildly camera-shaken photos. For sharper photos, use the AI denoise first, then apply targeted sharpening to edges only.
Topaz Photo AI
Topaz Photo AI includes a dedicated motion blur recovery module that analyzes blur direction and attempts to reverse it. It’s the most specialized tool on the market for this specific problem, and it can recover shots that look unsalvageable at first glance. Results vary based on the degree of blur.
Adobe Photoshop — Shake Reduction filter
Photoshop’s Filter → Sharpen → Shake Reduction uses blur trace estimation to attempt to reverse camera motion. It’s computationally intensive and imprecise on complex blurs but effective for mild, single-direction shakes.
Luminar Neo and Gigapixel AI
Both offer AI-powered sharpening and detail recovery. Gigapixel’s sharpening particularly excels at recovering fine texture in faces and natural elements. Neither is as targeted as Topaz for motion blur, but they’re solid all-around improvement tools.
Reality check on AI fixes
- AI tools can recover mild blur 1–2 stops of camera shake
- Severely blurred photos (complete loss of edge detail) cannot be recovered
- AI sharpening always introduces some artifacting at extreme settings
- Always shoot more frames than you need — selection beats correction every time
11. Common Mistakes That Make Camera Shake Worse
Some advice that circulates online — and some habits photographers develop on their own — actually make camera shake worse, not better.
- Shooting immediately after heavy exertion. If you’ve been hiking to a viewpoint, your heart rate and respiratory rate are elevated. Give yourself 2–3 minutes to settle before shooting handheld.
- Holding your breath for too long. Holding your breath for more than 3–4 seconds increases blood pressure and causes increased tremor. The window is short — use the pause, don’t extend it.
- Leaving image stabilization on during tripod shooting. As mentioned earlier, IS systems look for motion to correct — on a perfectly stable tripod, they can introduce a hunting oscillation. Always switch IS off when using a tripod.
- Gripping the camera too tight. A white-knuckle grip introduces more muscle tremor than a relaxed, firm hold. Firm but not tense — think of how you’d hold a bird you didn’t want to fly away.
- Shooting at maximum zoom without physical support. Maximum optical zoom and handheld shooting is a bad combination. If you must shoot at the long end, brace against something.
12. Exercises to Improve Hand Stability
If camera shake is a persistent problem for you — especially if you notice your hands shaking outside of photography too — some targeted conditioning can help.
Wrist stabilization holds
Hold your camera extended at arm’s length for 60 seconds with the live view screen on, watching for any movement. Rest, repeat. This builds endurance in the stabilizing muscles of your wrist and forearm. Do this 3–4 times before a shoot.
Slow breathing practice
4-7-8 breathing (inhale for 4 counts, hold for 7, exhale for 8) reduces physiological arousal and lowers tremor. Practiced regularly, it trains your nervous system to be calmer in high-stakes shooting situations. Some event photographers do this before walking into a venue.
Grip strength and fine motor control
Rock climbers, surgeons, and concert pianists all have exceptionally stable hands. The common thread is fine motor control training. Even basic exercises — holding a pen perfectly still, practicing slow, controlled movements — build neural pathways that improve camera handling.
Reducing caffeine before critical shoots
This isn’t an exercise but a habit: if you know you have an important shoot, consider reducing caffeine intake the morning of. Caffeine’s half-life is 5–6 hours, so even morning coffee can affect afternoon steadiness.
13. Beginner vs. Professional Techniques Compared
| Situation | Beginner Approach | Professional Approach |
|---|---|---|
| Low light indoor | Lower ISO, hope for the best | Push ISO, maintain fast shutter, shoot RAW |
| Long focal length | Shoot handheld at any speed | Apply reciprocal rule × 2, brace or use monopod |
| Shutter press | Stab or jab the button | Slow squeeze, shoot on exhale |
| Image stabilization | Leave on all the time | On handheld, off on tripod; correct mode selected |
| Blurry photo recovery | Discard or apply over-sharpening | AI tools, targeted sharpening, realistic culling |
| Physical preparation | Not considered | Breathing, stance, rest before important shoots |
14. 2026 Stabilization Trends to Know
Stabilization technology has moved faster in the last three years than in the previous decade combined. Here’s what’s happening now that changes the shaky-hands equation:
Computational stabilization in smartphone cameras
Apple’s iPhone 16 Pro and Google Pixel 9 now combine optical image stabilization with sensor-shift micro-adjustment and computational multi-frame processing. The result is that smartphone cameras can now produce sharp handheld shots at shutter speeds that would have required a tripod even three years ago. If you’re still shooting on a 2020-era phone, the stabilization improvements alone may be worth upgrading.
IBIS improvements in mirrorless bodies
The Sony A7RV, Nikon Z8, and Canon EOS R5 Mark II all offer 8-stop IBIS compensation. This means a 200mm shot that would have required 1/200s minimum can theoretically be shot as slow as 1/1.5s handheld. These claims are optimistic under real conditions, but 5–6 stops of reliable compensation is achievable — genuinely transformative for low-light handheld work.
AI-native sharpening as a capture feature
Some camera manufacturers are now building AI motion compensation directly into the image processing pipeline — not just as a post-processing tool but as an in-camera feature that processes frames before they’re written to the card. This trend will accelerate through 2026 and 2027.
Electronic shutter with silent speed prioritization
Modern electronic shutters eliminate the mechanical vibration of the shutter curtain entirely, removing one source of camera shake that was previously invisible. Combined with AI speed prioritization in Auto ISO + Shutter Priority modes, cameras are getting smarter about protecting against shake automatically.
Final Thoughts: Sharp Photos Are Learnable
Camera shake is one of the most discouraging problems a photographer can face — because the photos look fine in the viewfinder and terrible on screen. But it’s also one of the most solvable.
Start with your camera settings: the reciprocal rule for shutter speed, sensible ISO pushing, and correct stabilization mode. Then address your technique: elbows in, breathing control, squeeze don’t stab. Add a monopod or tripod when the situation calls for it. And for the shots that slip through, let AI tools do the recovery work.
Most importantly, understand that this improves with practice. Every shoot where you consciously apply these techniques builds muscle memory that eventually becomes automatic. The photographers who get consistently sharp images aren’t necessarily steadier than you — they’ve just made the right habits second nature.
Frequently Asked Questions
What is the minimum shutter speed to avoid camera shake when shooting handheld?
The standard guideline is the reciprocal of your focal length — so 1/50s at 50mm, 1/200s at 200mm. If your hands are particularly unsteady or you’re shooting at the end of a tiring day, double or triple this value. On a crop sensor, apply your camera’s crop factor (1.5× for Nikon/Sony APS-C, 1.6× for Canon) to the effective focal length before applying the rule.
Does image stabilization mean I don’t need to worry about shutter speed?
No. Image stabilization compensates for camera shake — it does not freeze subject motion. If your subject is moving, you still need a fast enough shutter speed to freeze that movement. Stabilization gives you more flexibility when the subject is stationary; it doesn’t change the physics of capturing a moving subject.
Can shaky-hands photography be fixed in post-processing?
Mild blur from camera shake can be reduced using AI tools like Topaz Photo AI, Adobe Lightroom’s Denoise, or Photoshop’s Shake Reduction filter. Severe blur — where fine detail is completely lost — cannot be recovered. Think of post-processing as a safety net for mild shake, not a solution for serious blur.
Why are my photos blurry even at fast shutter speeds?
If your shutter speed is already fast and photos are still blurry, the cause is likely not camera shake at all. Check autofocus accuracy (is the focus landing on your intended subject?), lens calibration (some lenses need micro-adjustment), aperture (very wide apertures at f/1.2–f/1.4 have extremely thin depth of field), and subject motion (especially at the frame edges, where subjects move through the frame).
Is a monopod worth it if I already own a tripod?
Yes — they serve completely different use cases. A tripod is for planned, stationary shots where you have time to set up. A monopod is for fast-moving situations (sports, events, wildlife) where a tripod would be impractical. The support you’ll actually use beats the perfect support left in the car.
Do caffeine and stress genuinely affect camera shake?
Yes, measurably. Caffeine is a stimulant that elevates natural physiological tremor. Stress and adrenaline trigger the same mechanism. For casual shooting, the effect is minor. For macro, wildlife, or any situation where you’re pushing the limits of handheld stability, they matter. Some professional photographers intentionally reduce caffeine before high-precision shoots.